 Save
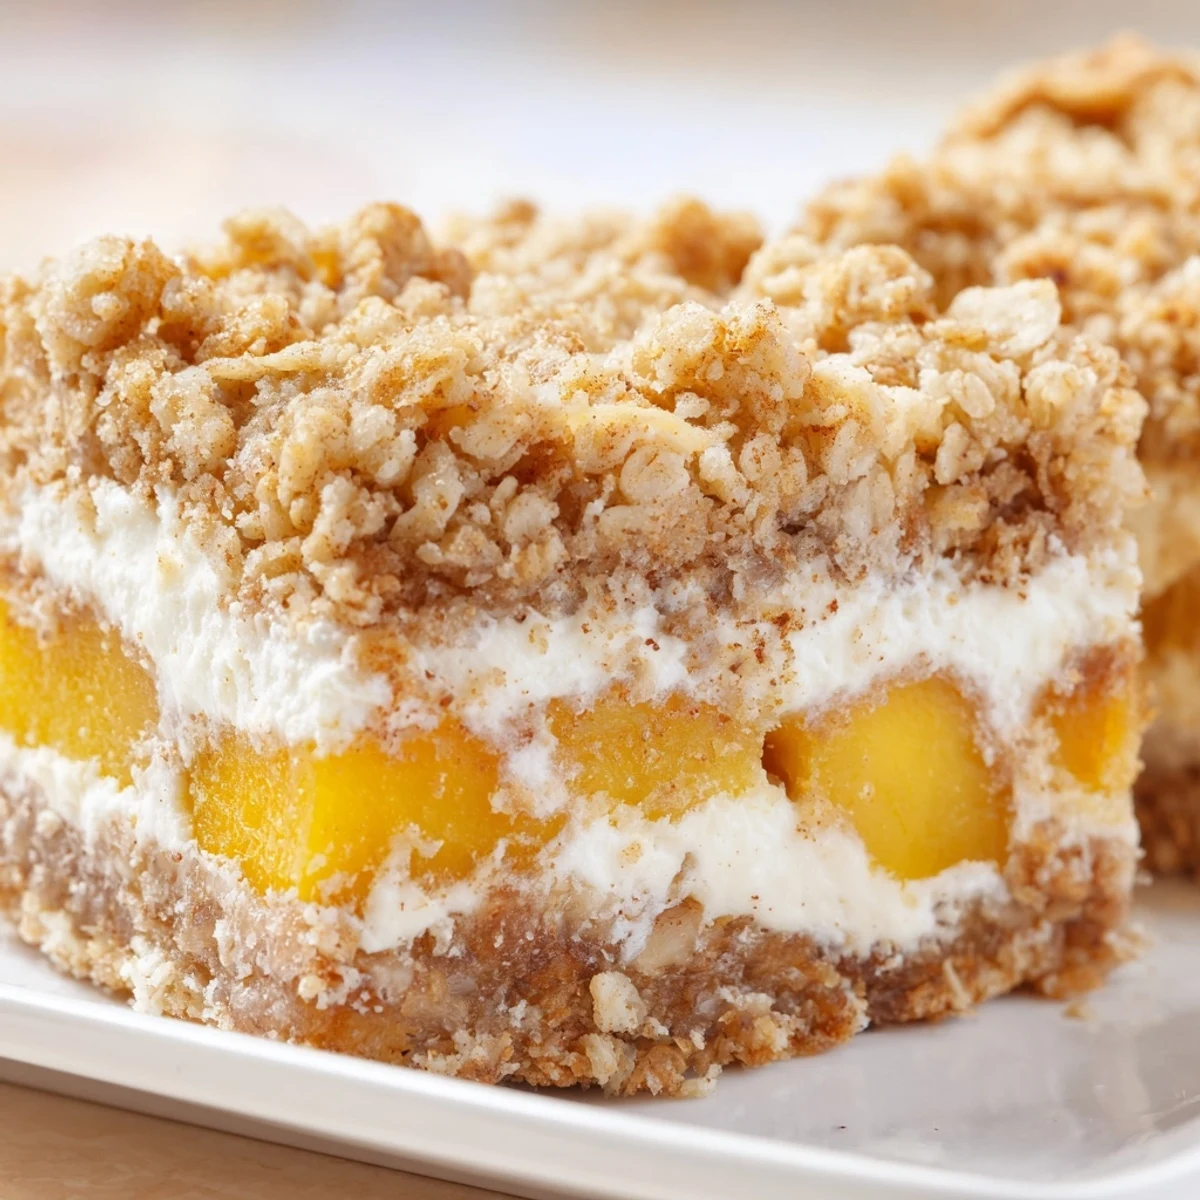
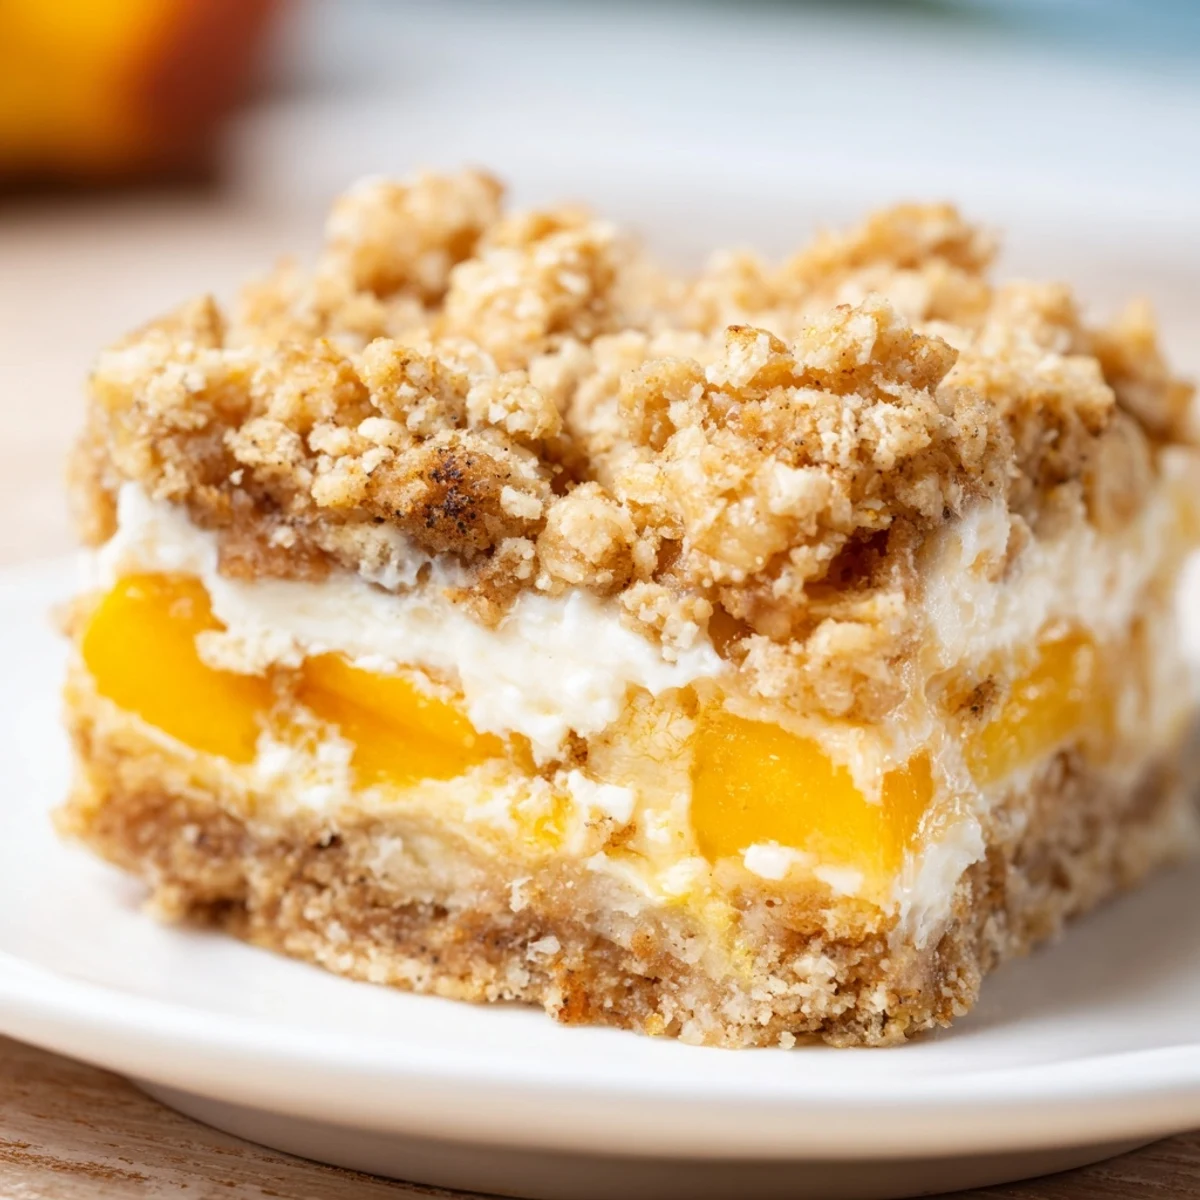
Save These summery bars feature three delicious layers: a buttery oat crumble base, a sweet cream cheese filling, and fresh juicy peaches, all topped with more crumble. The combination creates a perfect balance of textures and flavors that remind you of peach cobbler but in portable form.
Start by mixing flour, oats, sugar, and cold butter to create the crumble. Press most of it into your pan, then spread a mixture of cream cheese, sugar, egg, and vanilla over the base. Toss fresh peaches with cornstarch and lemon juice, arrange them on top, and finish with the remaining crumble.
After baking until golden, let them cool completely—this step is crucial for clean slices. The bars need at least two hours in the refrigerator to set properly. Serve chilled or at room temperature, perhaps with vanilla ice cream on the side.
The first time I made these crumble bars, my kitchen smelled like caramelized peaches and butter for hours afterward. My roommate kept wandering in, asking if they were done yet. We ended up eating them warm from the pan with ice cream melting over the top.
I brought these to a July 4th potluck last summer and watched them disappear in record time. My friend Sarah, who never eats dessert, went back for seconds. Now she texts me every peach season asking when I'll make them again.
Ingredients
- 2 cups all-purpose flour: Creates the structure for both crust and crumble topping
- 1 1/2 cups old-fashioned rolled oats: Adds wonderful texture and that classic crumble crunch
- 1 cup granulated sugar: Sweetens the crumble layers just enough to complement the peaches
- 1/2 tsp salt: Balances all the sweetness and brings out flavors
- 1/2 tsp ground cinnamon: Warm spice that pairs perfectly with peaches
- 1 cup unsalted butter, cold and cubed: Cold butter is essential for creating that crumbly, textured topping
- 8 oz cream cheese, softened: Forms the luscious creamy layer between fruit and crumble
- 1/3 cup granulated sugar: Sweetens the cream cheese filling without making it cloying
- 1 egg: Helps set the cream cheese layer while keeping it creamy
- 1 tsp vanilla extract: Enhances all the other flavors
- 3 cups fresh peaches, peeled and diced: The star of the show, use ripe but firm peaches
- 1 tbsp cornstarch: Thickens the peach juices so the bars hold together
- 2 tbsp lemon juice: Brightens the peach flavor and balances sweetness
- 1 tbsp granulated sugar: Just a touch to macerate the peaches
Instructions
- Preheat and prep your pan:
- Heat your oven to 350°F and line a 9x13-inch baking pan with parchment paper, letting some hang over the sides for easy removal later.
- Make the crumble mixture:
- Combine flour, oats, sugar, salt, and cinnamon in a large bowl. Cut in the cold butter using a pastry blender or your fingertips until you have coarse crumbs throughout.
- Press the base:
- Reserve about one-third of the crumble mixture for the topping. Press the remaining two-thirds firmly and evenly into the bottom of your prepared pan.
- Prepare the creamy layer:
- Beat softened cream cheese and sugar until completely smooth. Add the egg and vanilla, beating again until fully combined and glossy.
- Spread it on:
- Drop dollops of the cream cheese mixture over the crust and gently spread it into an even layer, leaving a small border around the edges.
- Prep the peaches:
- Toss diced peaches with cornstarch, lemon juice, and sugar in a bowl until well coated.
- Layer the fruit:
- Arrange the peach pieces evenly over the cream cheese layer, slightly overlapping if needed.
- Add the topping:
- Sprinkle the reserved crumble mixture evenly over the peaches, covering most of the fruit layer.
- Bake to golden perfection:
- Bake for 38 to 42 minutes until the top is golden brown and the center barely jiggles when you gently shake the pan.
- Cool completely before slicing:
- Let the bars cool completely at room temperature, then refrigerate for at least 2 hours until firm. Lift them out using the parchment paper and slice into 12 bars.
 Save
Save My grandmother tried these and said they reminded her of the peach pies her mother used to make in rural Georgia. She sat at the kitchen table, eating one slowly with a cup of tea, telling me stories about harvest seasons when she was a girl.
Making Them Ahead
These bars actually improve with a day in the refrigerator. The flavors meld together and the textures set up beautifully. I've made them the evening before a party and served them the next day to rave reviews.
Fruit Variations
While peaches are classic, I've made these with nectarines when peaches weren't quite in season yet. Berries work too but release more juice, so you might want to add an extra teaspoon of cornstarch to the fruit mixture.
Serving Suggestions
These bars are delicious on their own but absolutely sing with a scoop of vanilla ice cream or a dollop of lightly sweetened whipped cream. They also pair beautifully with afternoon coffee or as a sweet ending to a backyard barbecue.
- Sprinkle a little sea salt over the top before serving for a sweet-salty contrast
- Warm individual bars in the microwave for 15 seconds if serving chilled
- Store in the refrigerator for up to 5 days, though they rarely last that long
 Save
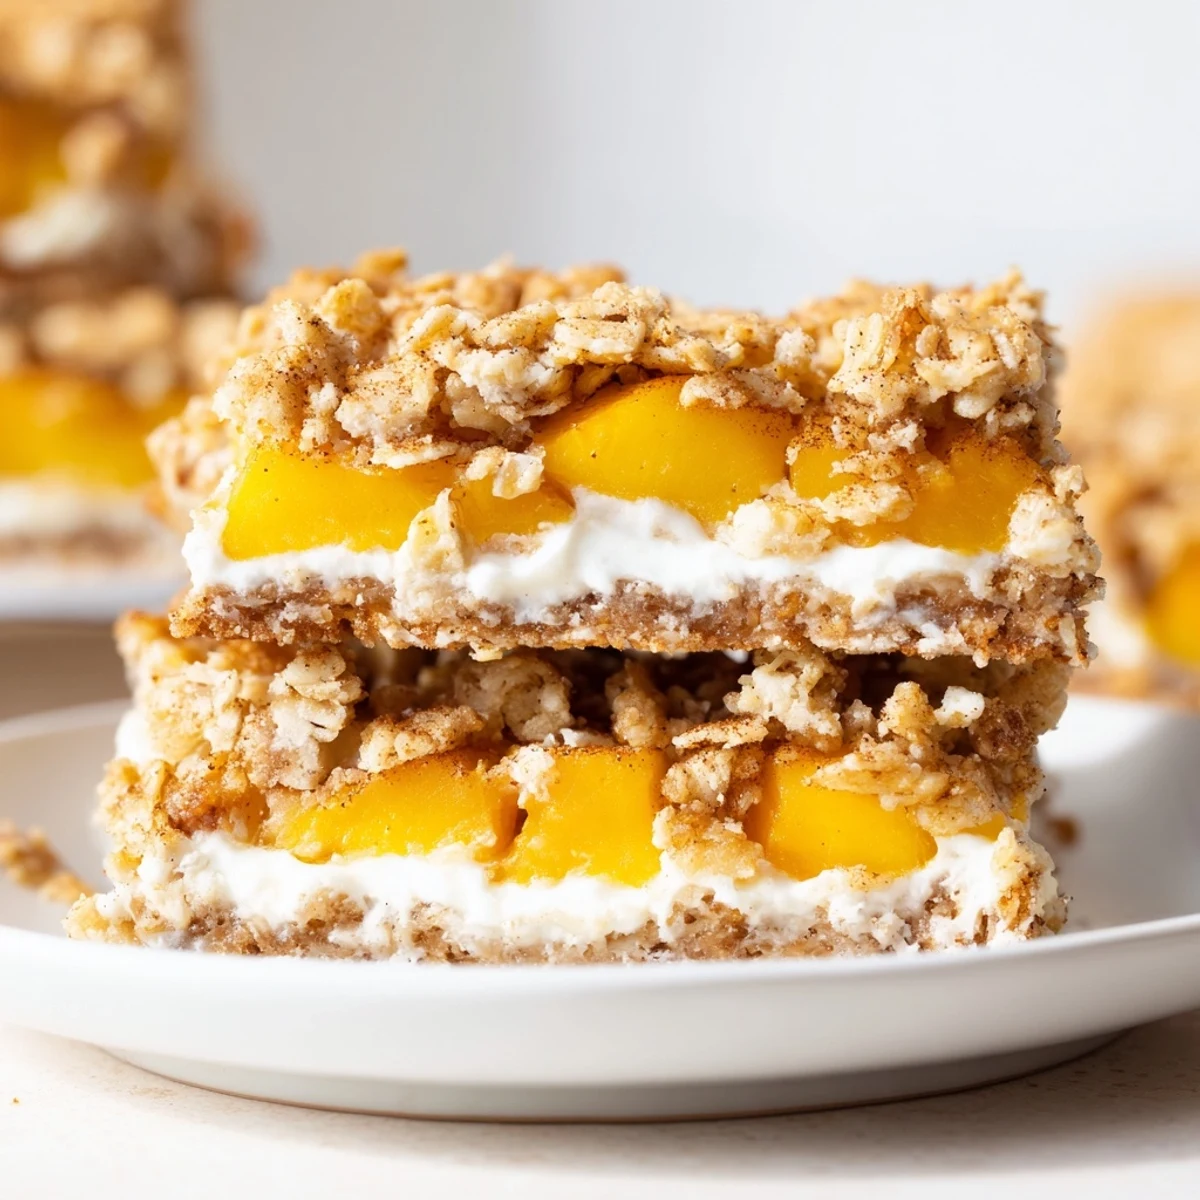
Save There's something deeply satisfying about cutting into these bars and seeing those beautiful peach and cream layers. Hope they become a summer tradition in your kitchen too.
Recipe FAQs
- → Can I use frozen peaches instead of fresh?
-
Yes, frozen peaches work well in this. Thaw them completely and drain off any excess liquid before tossing with cornstarch. Frozen peaches may release more moisture during baking, so you might want to add an extra teaspoon of cornstarch to help thicken the fruit layer.
- → Why do the bars need to be refrigerated before cutting?
-
Chilling helps the cream cheese layer set completely, making clean slices possible. Warm bars will crumble and make a mess. At least two hours in the refrigerator firms everything up, giving you neat, presentable pieces that hold their shape when served.
- → How should I store these bars?
-
Keep them in an airtight container in the refrigerator for up to five days. The cream layer makes dairy storage necessary. You can also freeze them for up to three months—wrap individual portions in plastic wrap, then place in a freezer bag. Thaw overnight in the refrigerator before serving.
- → Can I make this gluten-free?
-
Absolutely. Use certified gluten-free rolled oats and replace the all-purpose flour with a 1:1 gluten-free flour blend. The texture will remain similar, and the flavor will be just as delicious. Double-check that all your ingredients, including the oats, are certified gluten-free to avoid cross-contamination.
- → What other fruits can I use?
-
Nectarines work beautifully as a direct substitute. Berries like blueberries, raspberries, or sliced strawberries also make excellent variations. Adjust the sugar slightly based on fruit sweetness—tart berries may need an extra tablespoon. Stone fruits hold up best during baking, but almost any summer fruit will create a tasty twist.
- → Can I make these ahead of time?
-
These bars actually taste better the next day as flavors meld together. You can bake them up to two days in advance, refrigerate, and slice when ready to serve. For longer storage, freeze whole uncut bars wrapped tightly in plastic and foil, then thaw and slice when needed. The crust may soften slightly after freezing but will still be delicious.
