 Save
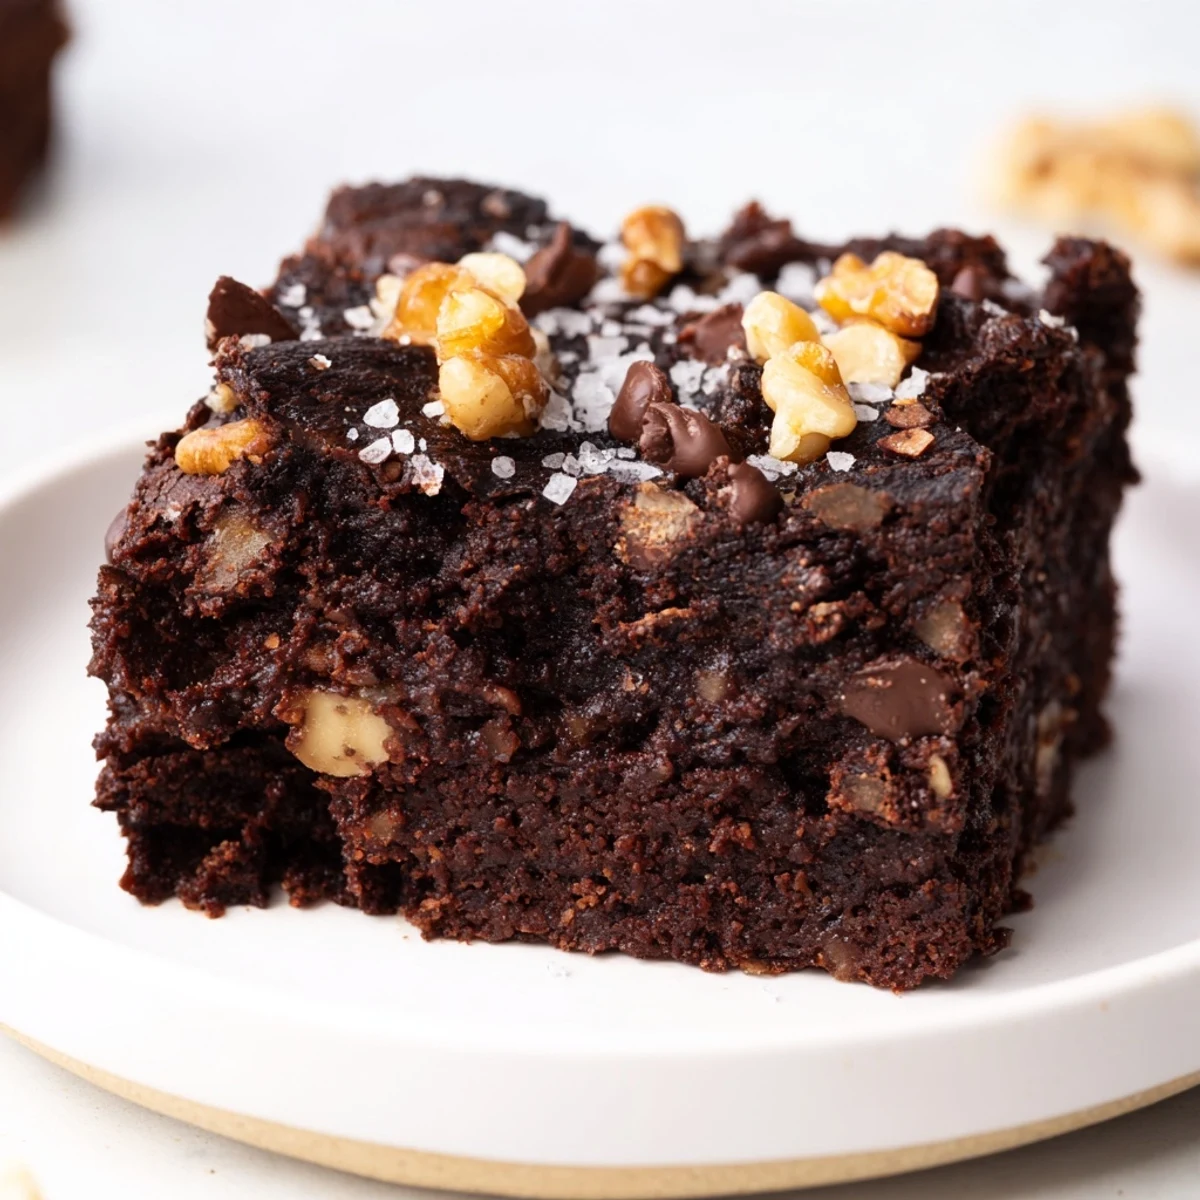
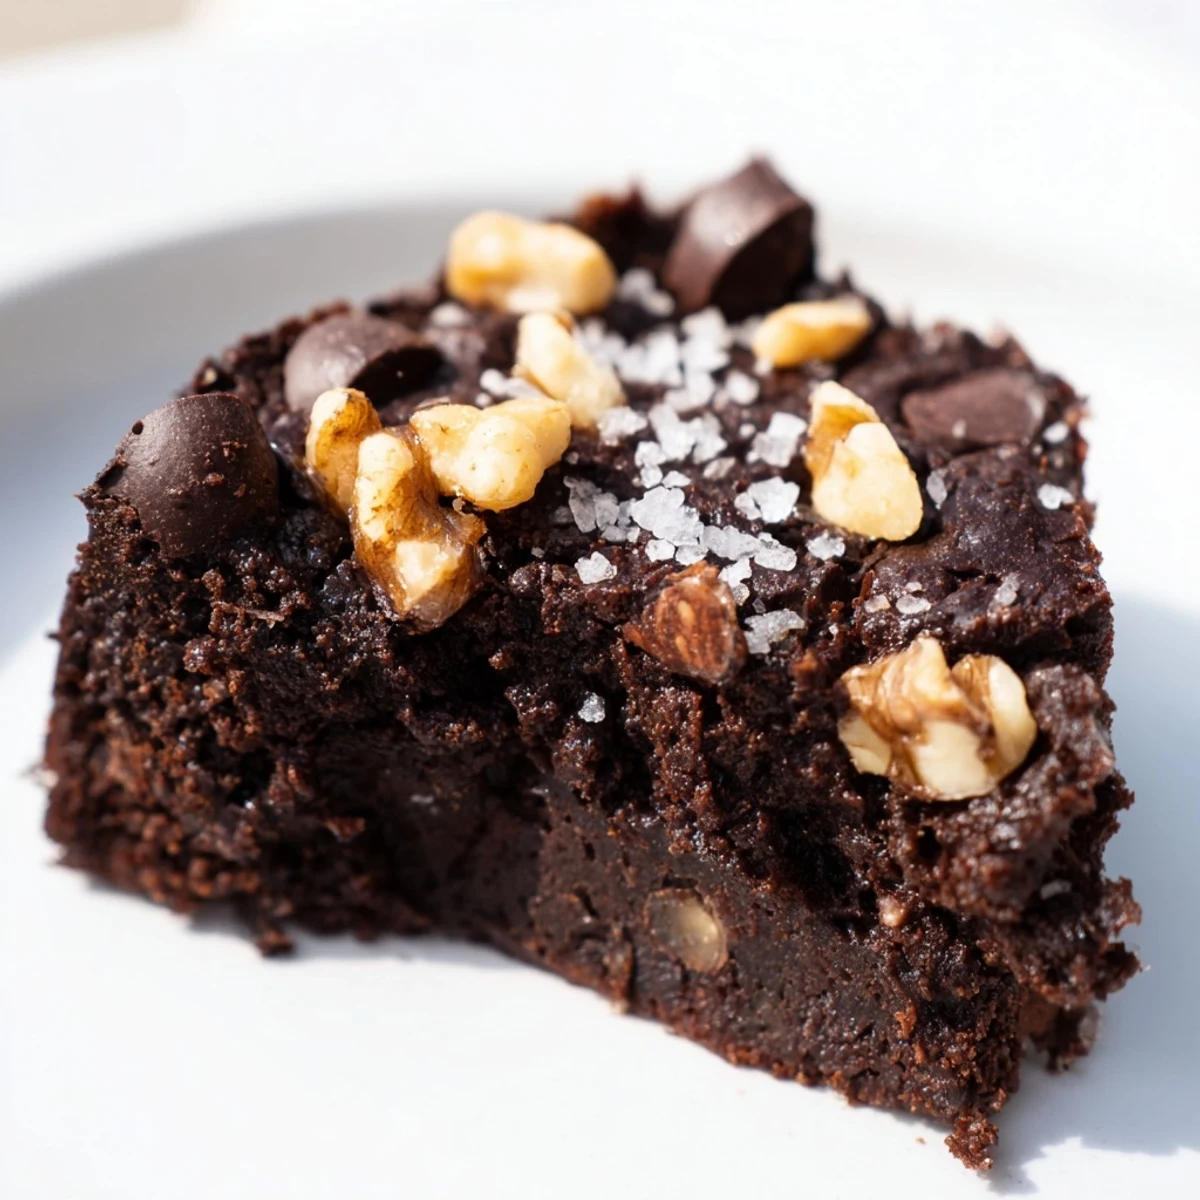
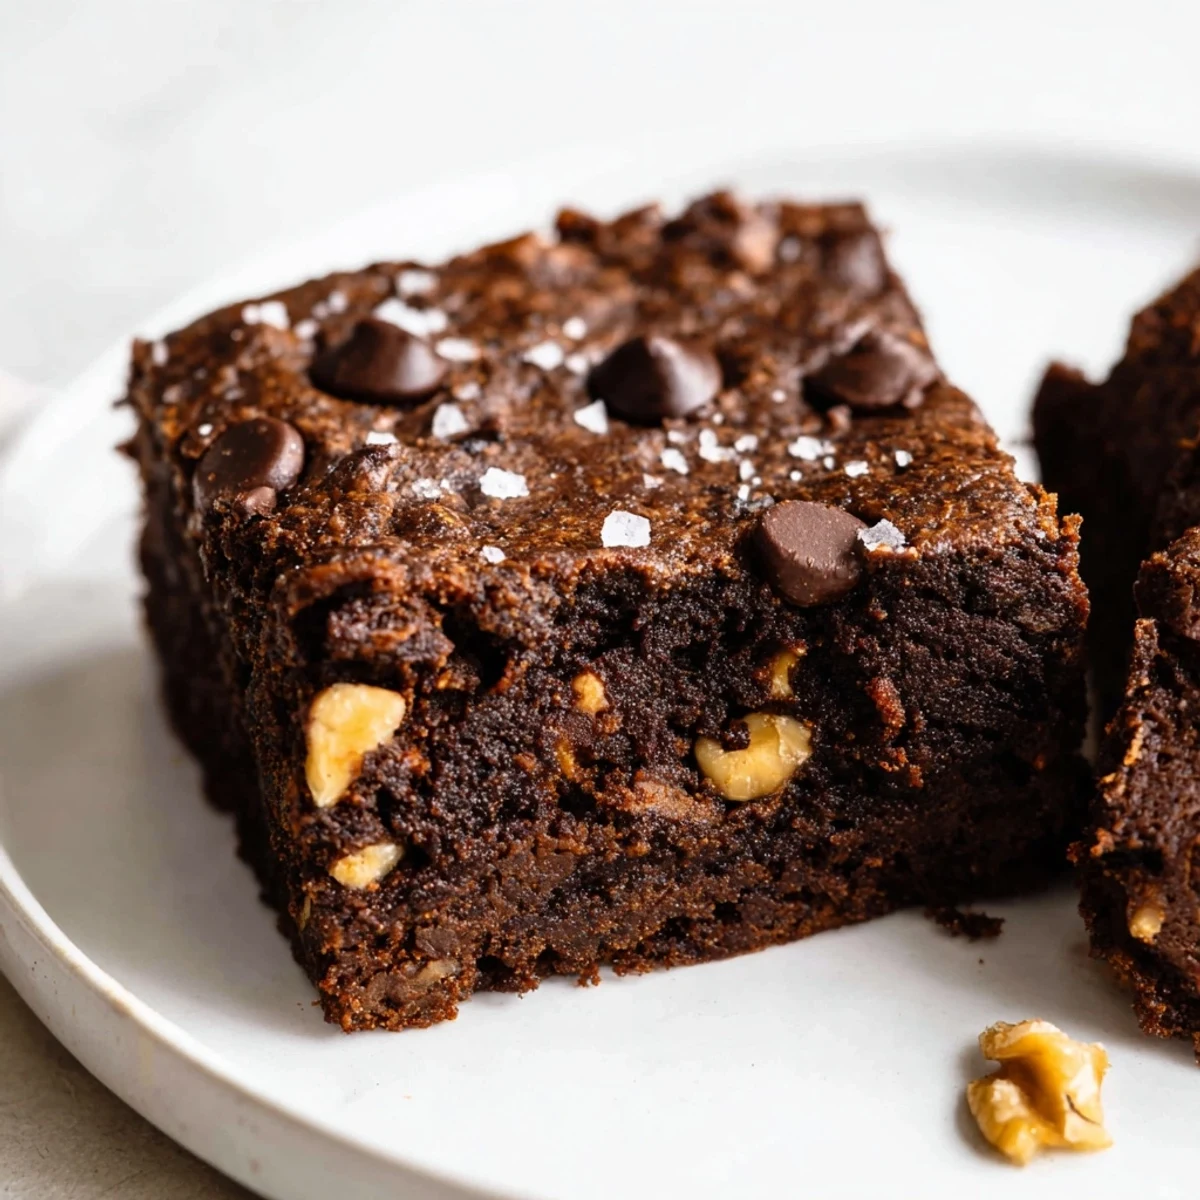
Save These brownies combine almond flour, cocoa, and rich dark chocolate for a naturally gluten-free treat. Simple preparation and baking yield moist, fudgy bites perfect for any chocolate lover. Optional nuts add texture, while baked slowly to ensure a tender crumb. Ideal for those seeking a gluten-free indulgence without sacrificing flavor, this dessert pairs well with a sprinkle of sea salt or a scoop of vanilla ice cream.
My friend Sarah brought these brownies to a potluck on a rainy Thursday, and I'll never forget biting into one while we huddled around her kitchen island debating whether almond flour could ever replace wheat. Turns out, it doesn't just replace it—it makes something entirely different and better. That first fudgy bite had me asking for the recipe before she'd even set the pan down, and I've been making them ever since.
I made these for my colleague Mike's birthday last spring, and watching his face when he realized they were gluten-free was priceless—he kept saying they tasted like the brownies his grandmother made before he went gluten-free at age twelve. We ended up eating half the pan at the office, and he asked me to make them every month after that.
Ingredients
- Almond flour (1 cup): This is the star—it's finely ground almonds that bring natural moisture and a subtle nuttiness that chocolate loves, plus it keeps these brownies from tasting dense or gritty like some gluten-free bakes.
- Unsweetened cocoa powder (½ cup): Don't skimp here; Dutch-process cocoa powder gives a deeper, richer chocolate flavor than natural cocoa.
- Baking powder (½ teaspoon): Just enough to help them rise slightly without making them cake-like.
- Fine sea salt (¼ teaspoon): This tiny amount amplifies the chocolate and balances the sweetness in a way that makes people ask what the secret ingredient is.
- Unsalted butter or coconut oil (½ cup melted): Melting it first makes the batter smooth and easy to work with, and coconut oil works beautifully if you're keeping these dairy-free.
- Granulated and brown sugar (¾ cup plus ¼ cup): The combo of both gives you deeper flavor and the slight chewiness that makes a brownie feel indulgent.
- Eggs at room temperature (2 large): Warm eggs whisk in more smoothly and create a better texture; pull them out of the fridge 10 minutes before you start.
- Vanilla extract (1 teaspoon): Pure extract, not imitation—it makes a real difference in how sophisticated these taste.
- Dark chocolate chips (½ cup): Check that they're certified gluten-free, and use the best quality you can find because they don't disappear into the batter like regular baking chocolate would.
- Walnuts or pecans (¼ cup chopped, optional): Nuts add a textural surprise and keep each bite from feeling too smooth.
Instructions
- Set up your space:
- Preheat the oven to 350°F and line your 8-inch square pan with parchment paper, leaving some hanging over the edges so you can lift the whole thing out later without it sticking or crumbling. This single step saves you from frustration when you're trying to slice warm brownies.
- Whisk the dry teammates together:
- In a medium bowl, combine the almond flour, cocoa powder, baking powder, and salt using a whisk so every bit of leavening is evenly distributed and you don't end up with dense pockets.
- Build the wet base:
- Pour the melted butter and both sugars into a large bowl and whisk until they look smooth and slightly pale, which takes about a minute—you're dissolving the sugar, not aerating like you would with eggs alone. Add the room-temperature eggs and vanilla, then whisk vigorously until the mixture is thick and glossy; this is where the eggs add structure.
- Marry them together:
- Fold the dry mixture into the wet mixture using a spatula, stirring just until you don't see streaks of flour anymore—overmixing toughens almond flour bakes, so resist the urge to blend until perfect. Gently fold in the chocolate chips and nuts so they're evenly scattered.
- Bake with intention:
- Spread the batter into your pan and smooth the top, then bake for 23–25 minutes until a toothpick inserted in the center pulls out with moist chocolate crumbs but no glossy wet batter clinging to it. The smell will be intoxicating, but this is the moment patience pays off—underbaked is better than overbaked here.
- Cool and slice:
- Let them rest in the pan on a wire rack until completely cooled, which takes about 15 minutes and lets the crumb set up so they don't fall apart when you cut them. Use the parchment overhang to lift the whole slab out, then slice with a sharp knife, wiping the blade between cuts for clean edges.
 Save
Save There's something quietly special about pulling a batch of these out of the oven on a Sunday afternoon while someone you care about sits nearby—the kitchen fills with that deep, almost black-cocoa smell, and suddenly everything else stops mattering. These brownies have a way of turning an ordinary moment into something worth remembering.
The Almond Flour Advantage
Almond flour is basically ground almonds with most of their natural oils intact, which means it brings moisture and richness to baking in a way wheat flour never could. When you use it in brownies, you're not just replacing gluten—you're building something with a denser crumb and a slightly more tender bite. The texture lands somewhere between a traditional brownie and a flourless chocolate cake, which honestly feels like the best of both worlds.
Temperature and Timing Matter
The difference between a fudgy brownie and a cakey one often comes down to those last two minutes in the oven and how long you let it rest before cutting. I learned this the hard way by pulling a batch out early, only to find it collapsed slightly as it cooled—now I set a timer and trust it. Room-temperature eggs also make a difference because cold eggs won't whisk in as smoothly, and you lose some of that silky texture that makes these feel indulgent.
Serving and Storage
These brownies taste best at room temperature when the chocolate flavor is fullest, though some people love them chilled for a more cake-like texture. They keep in an airtight container for up to four days, and honestly they taste even better the next day once the flavors have settled together.
- For extra decadence, serve them warm with a scoop of vanilla ice cream melting on top.
- A tiny pinch of flaky sea salt sprinkled on top right after baking makes people ask what your secret is.
- If you want them extra fudgy, underbake by a minute and chill them in the fridge before slicing.
 Save
Save These brownies have quietly become the thing I make when I want to prove to someone that gluten-free baking isn't a compromise—it's just a different way of getting to something delicious. Every time someone takes a bite and looks surprised, I know I've passed along something worth sharing.
Recipe FAQs
- → Can I substitute coconut oil for butter?
-
Yes, coconut oil can replace butter for a dairy-free alternative, maintaining moisture and richness.
- → How do I know when the brownies are done baking?
-
Insert a toothpick into the center; it should come out with moist crumbs but no wet batter for perfect fudginess.
- → Can I add nuts to the brownies?
-
Absolutely, folding in chopped walnuts or pecans adds a pleasant crunch and complements the chocolate flavors.
- → Is almond flour suitable for gluten-free diets?
-
Almond flour is naturally gluten-free, making it a great base for baked goods that avoid traditional wheat ingredients.
- → What is the best way to store these brownies?
-
Store brownies in an airtight container at room temperature for up to 3 days or refrigerate to extend freshness.
