 Save
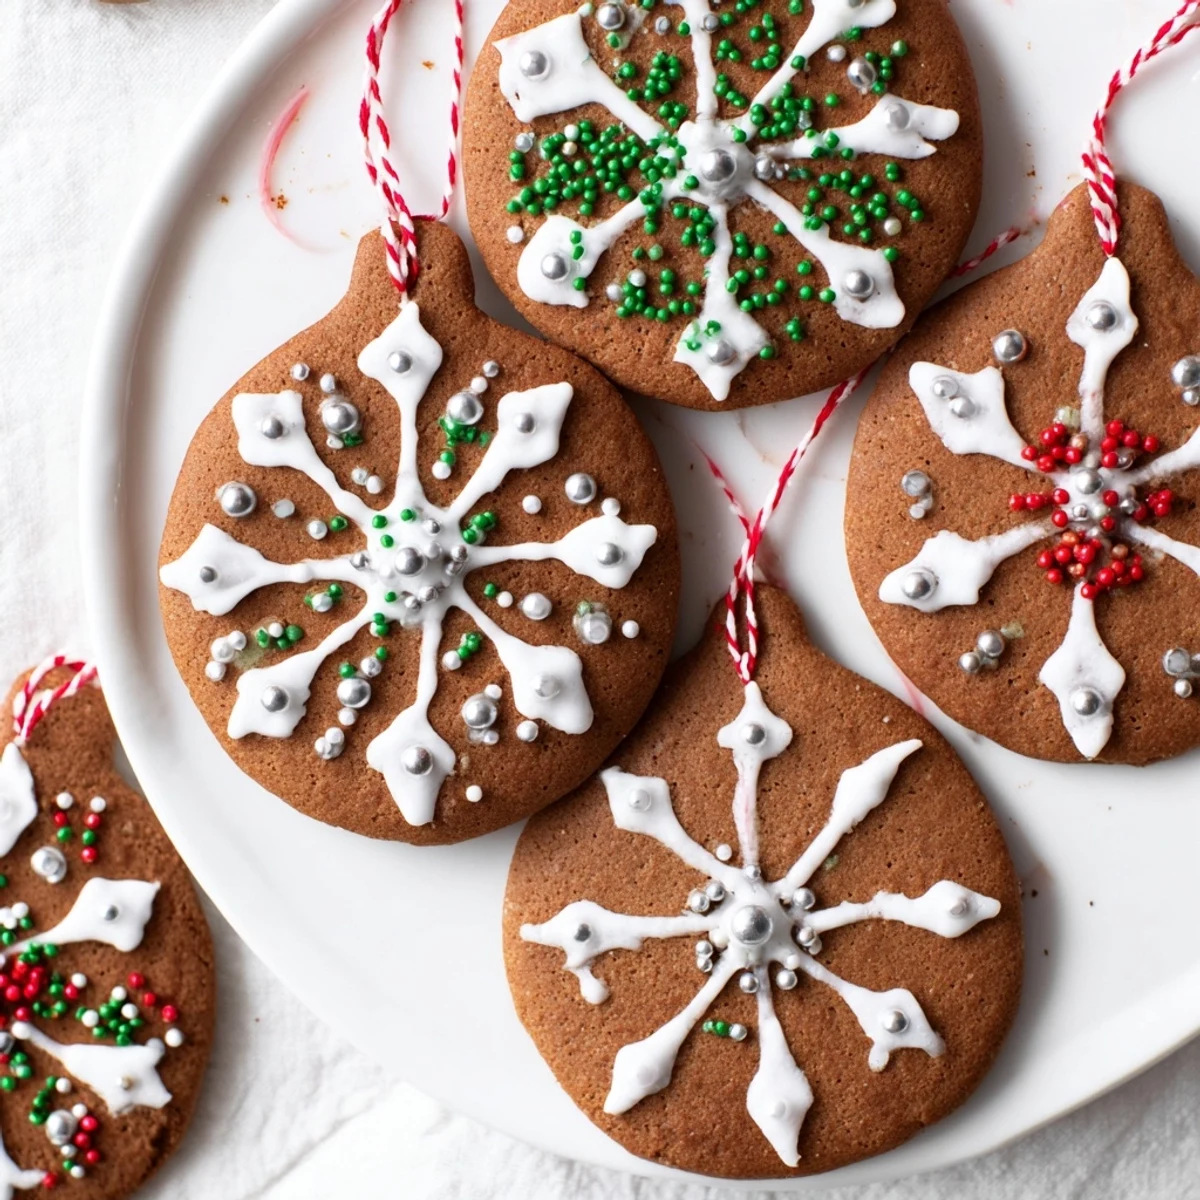
Save This delightful preparation blends warm spices like ginger, cinnamon, and cloves into a soft dough that chills before being rolled and cut into holiday-themed ornaments. Baked to a tender crisp, the cookies cool before being decorated with royal icing and colorful sprinkles. Perfect for festive displays or sharing during cozy winter celebrations, the use of molasses and aromatic spices creates a rich, comforting flavor enhanced by decorative ribbons for hanging.
I still remember the year my grandmother pressed a warm gingerbread ornament into my hand at her kitchen table, steam rising from a fresh batch cooling on racks. She'd been making these for decades, and I watched her pipe royal icing with such care, as if each cookie deserved its own tiny masterpiece. That moment sparked an obsession—now every December, I find myself recreating that same magic in my own kitchen, the scent of ginger and molasses filling the house like a cherished holiday memory made edible.
I baked these with my five-year-old nephew last winter, and watching his face light up when he poked the hole through the dough with a straw was pure joy. He decorated his ornaments with wild abandon—more sprinkles than icing—and they hung proudly on his family's tree for weeks. Some gifts disappear after the holidays, but these cookies became part of their family tradition.
Ingredients
- All-purpose flour (3 cups): The foundation of your dough—it's what gives these cookies their structure while keeping them tender enough to decorate
- Ground ginger (1 tablespoon): The star player that makes people close their eyes and smile when they taste one of these
- Ground cinnamon (2 teaspoons): Brings warmth and depth that transforms simple spices into something magical
- Ground cloves (1/2 teaspoon): Just enough to whisper mystery without overpowering—less is truly more here
- Ground nutmeg (1/2 teaspoon): The final spice layer that ties everything together in a cozy embrace
- Baking soda (1/2 teaspoon): The leavening agent that gives these cookies their characteristic tender crumb
- Salt (1/2 teaspoon): Never skip this—it amplifies all those beautiful spices
- Unsalted butter (3/4 cup, softened): Softening it properly matters more than you'd think; cold butter fights you at every step
- Dark brown sugar (3/4 cup, packed): Packed down, it brings moisture and a deeper molasses note than light brown would
- Unsulphured molasses (2/3 cup): This is where the soul of the cookie lives—don't substitute with blackstrap unless you love intense bitterness
- Large egg (1): Binds everything together and adds just enough richness
- Pure vanilla extract (1 teaspoon): One of those ingredients that makes you wonder why it's there until you taste the difference without it
- Royal icing: Whether homemade or store-bought, this is your edible glue and canvas for creativity
- Assorted sprinkles, edible glitter, or silver dragees: Let your imagination run wild—this is where personality shines
- Thin ribbons or twine: These transform cookies into heirloom decorations
Instructions
- Gather and whisk your dry ingredients:
- In a medium bowl, whisk together the flour, ginger, cinnamon, cloves, nutmeg, baking soda, and salt. As you whisk, lean close and breathe in that intoxicating spice aroma—this is what December smells like. Set the bowl aside and let those flavors get to know each other.
- Cream butter and brown sugar until they sing:
- In a large bowl, beat your softened butter and dark brown sugar together for about 2-3 minutes. You're looking for a texture that's noticeably lighter in color and fluffy, like sweet clouds. This step builds air into your dough, which makes these cookies tender rather than dense.
- Bring the wet ingredients together:
- Beat in the molasses, egg, and vanilla until everything is fully combined. The mixture should look glossy and thick. Don't rush this—let the mixer do the work and fully incorporate each addition.
- Marry wet and dry:
- Gradually add your whisked dry ingredients to the wet mixture, mixing until a soft dough forms. Start on low speed and go slowly—flour clouds are fun to watch but not to breathe. Mix just until you don't see streaks of flour anymore.
- Rest and chill your dough:
- Divide the dough in half, flatten each portion into a disk, wrap tightly in plastic wrap, and slide into the refrigerator for at least 1 hour. This rest lets the gluten relax and the flavors meld. You can also chill overnight, which actually deepens the spice flavors beautifully.
- Prepare your baking workspace:
- Preheat your oven to 350°F (175°C). Line your baking sheets with parchment paper—this prevents sticking and ensures even browning on the bottoms. Nothing's worse than breaking a cookie you've labored over.
- Roll and cut with joy:
- On a lightly floured surface, roll one disk of dough to about 1/4-inch (6 mm) thickness. This thickness is key—too thin and they'll be crispy rather than tender, too thick and they won't bake through. Use whatever holiday cookie cutters bring you happiness.
- Poke holes for hanging:
- Using a thin straw or skewer, gently poke a hole near the top of each cookie. Do this while the dough is still slightly warm from rolling—it's easier and the hole stays cleaner. If you wait until after baking, the cookies become more brittle and crack more easily.
- Space them on the sheets:
- Transfer each cut cookie to your prepared baking sheets, leaving about 1 inch between them. These cookies spread just a little, and you want room for that expansion without them touching.
- Bake until the edges tell you they're ready:
- Bake for 8-10 minutes, watching for the moment when the edges look set and slightly firm but the centers still look just barely soft. The cookies will firm up as they cool, so don't overbake or you'll end up with crackers instead of tender treats.
- Cool strategically:
- Let the cookies sit on the baking sheet for 5 minutes—this is crucial. They'll firm up just enough to handle without breaking. Then transfer them to wire racks to cool completely. This two-step cooling prevents them from breaking and from steaming on the hot pan.
- Decorate with love:
- Once completely cool, pipe or spread royal icing on each cookie and go wild with your decorations. Sprinkles, edible glitter, dragees—whatever makes your heart happy. Let the icing set completely (about 30 minutes to 1 hour) before handling.
- Thread and hang:
- Once everything is set, thread your ribbon or twine through each hole. These cookies deserve to be displayed like the edible art they are.
 Save
Save The first time I gave one of these ornaments as a gift, the recipient hung it on her tree and didn't eat it. It stayed there all season, and she told me the next year that every time she looked at it, she felt cared for. That's when I realized these aren't just cookies—they're tiny vessels of warmth and intention.
Storage and Longevity
Undecorated cookies can live happily in an airtight container for up to 2 weeks, making them perfect for baking ahead if you're planning a big decorating session or gift-giving spree. Decorated cookies, with their icing and embellishments, last about a week in the same type of container. If you're making these to hang on a tree year after year, keep them away from humidity and light—a cool closet or even a sealed box in the pantry works beautifully. I've eaten cookies decorated the previous December that still tasted almost as good as fresh.
Flavor Variations and Personalization
Once you've made these once, the recipe becomes your playground. Want them spicier? Add a small pinch of black pepper—it sounds odd until you taste it, then you'll wonder how you ever made them without it. Prefer less ginger? Dial it back to 2 teaspoons and let the cinnamon shine instead. Some years I've added a tiny pinch of cayenne pepper for a gentle heat that catches people off guard in the best way. The molasses is adjustable too—use unsulphured for a clean, subtle flavor, or try blackstrap if you love deep, intense molasses notes (though use less, about 1/2 cup, as it's more assertive).
The Decoration Adventure
Royal icing is forgiving and fun—it can be piped in delicate lines, spread with a knife, or dripped artistically. If you're intimidated by homemade icing, store-bought works beautifully and honestly tastes just as good. The magic isn't in the icing itself but in the moment you spend decorating, the colors you choose, and the care you put into each cookie. Some years I keep them simple and elegant with just white icing and a sprinkle of sanding sugar. Other years I go maximum festive with rainbow sprinkles and edible glitter. There's no wrong way to do this.
- Let each coat of icing dry before adding another layer for a professional-looking finish
- Thin icing pipes more cleanly than thick icing, so if yours feels stiff, thin it with a tiny drop of water at a time
- Apply sprinkles immediately after icing while it's still slightly sticky—they'll adhere beautifully
 Save
Save These gingerbread ornaments have a way of becoming more than just a recipe—they become a ritual, a moment of peace in a busy season, and a tangible way to say I'm thinking of you to the people you love. Make them, share them, and let them become part of your story.
Recipe FAQs
- → What spices are used in these gingerbread ornaments?
-
Ground ginger, cinnamon, cloves, and nutmeg combine to create the warm, aromatic spice blend characteristic of these festive treats.
- → How is the dough prepared before baking?
-
The dry ingredients are mixed separately before combining with softened butter, brown sugar, molasses, egg, and vanilla. The dough is chilled for an hour to firm up for easy rolling.
- → How do I create the hole for hanging the ornaments?
-
Before baking, use a straw or skewer to poke a small hole near the top of each rolled cookie shape, allowing ribbons or twine to be threaded through after decorating.
- → What techniques ensure the cookies bake evenly?
-
Bake on parchment-lined sheets with space between each cookie, at 350°F (175°C) for 8-10 minutes until edges are firm but centers remain tender.
- → How can I decorate these spiced ornaments?
-
Once cooled, decorate with royal icing and assorted sprinkles or edible glitter, letting the icing set fully before hanging with ribbons or twine.
- → Can these ornaments be stored for later use?
-
Undecorated treats can be kept in an airtight container for up to two weeks; decorated ones should be enjoyed within one week for best texture and appearance.
