 Save
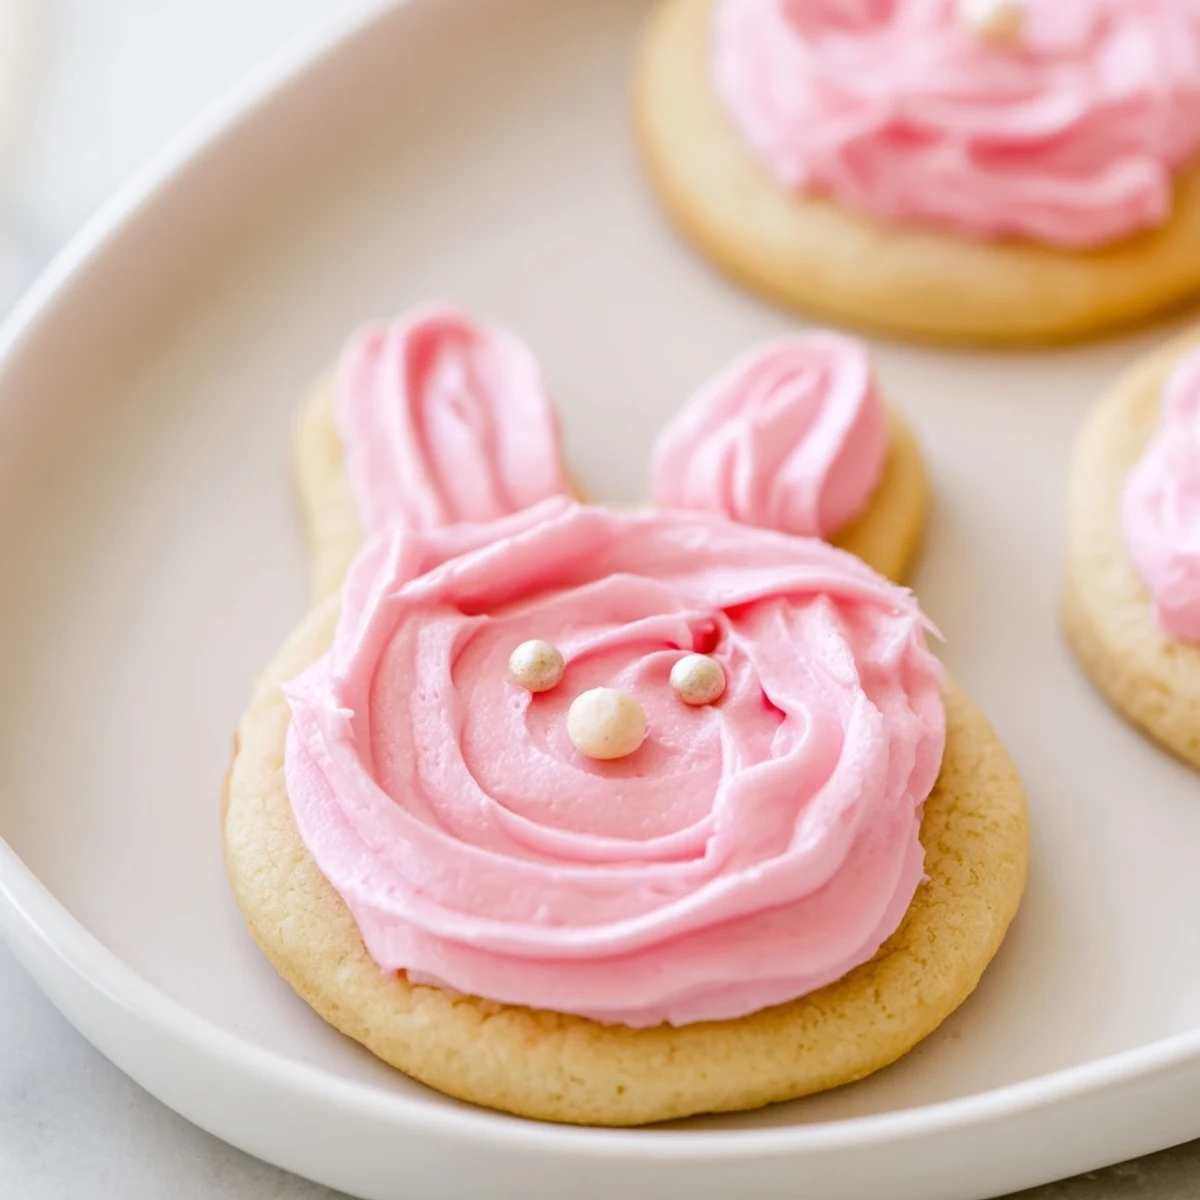
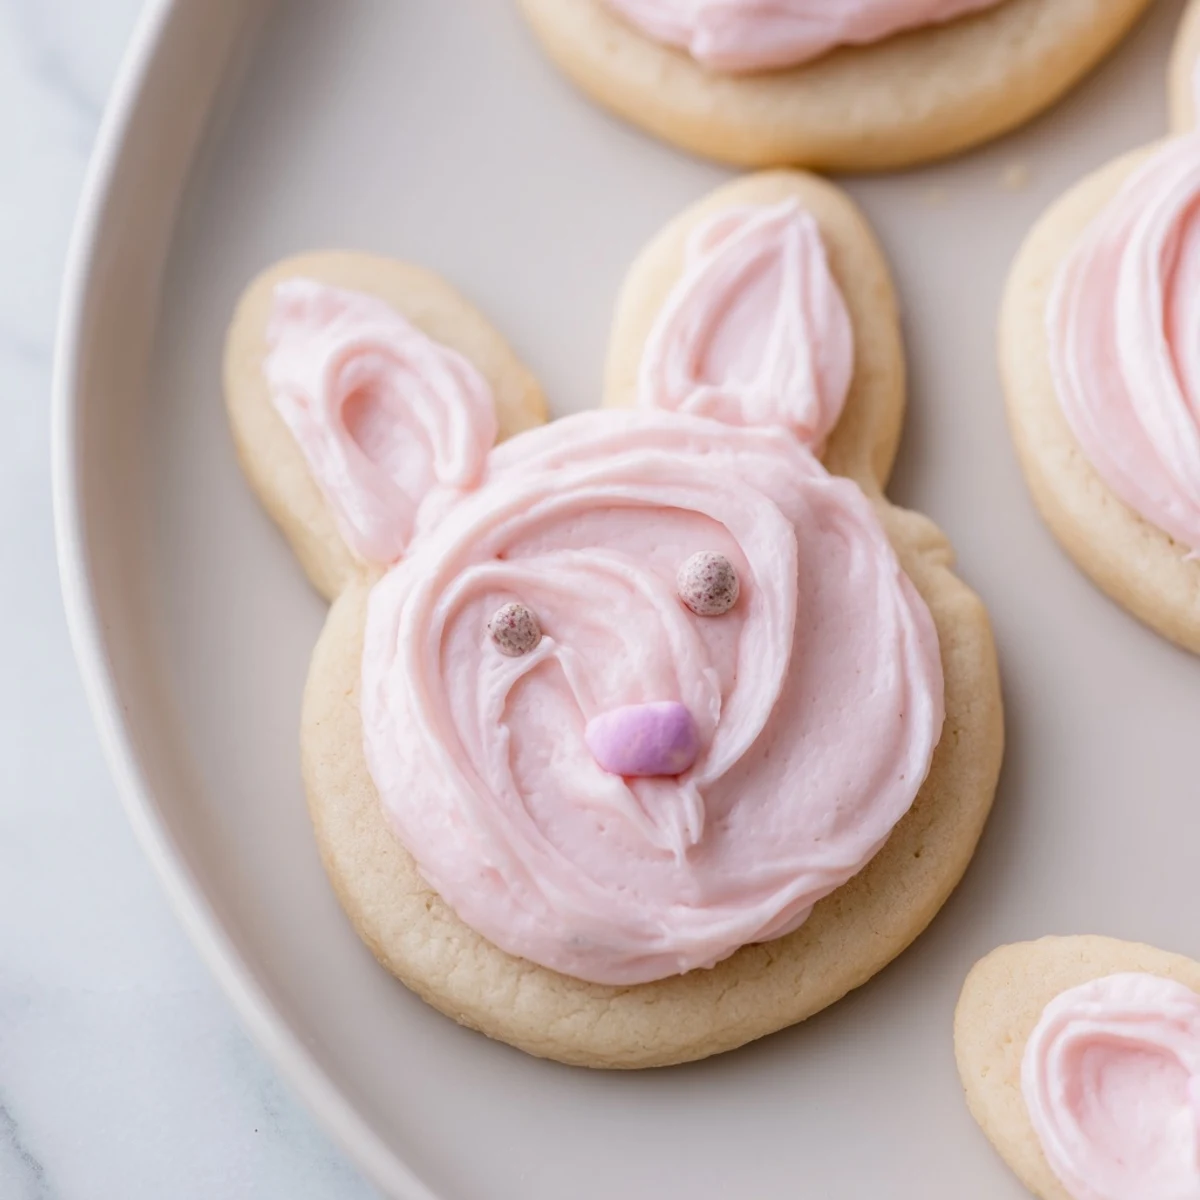
Save These delightful bunny-shaped treats feature buttery sugar cookies decorated with smooth, creamy buttercream frosting. The dough comes together quickly and requires chilling for easy rolling and cutting. Each cookie bakes to golden perfection in just 10 minutes, then transforms into an adorable bunny with pastel-tinted frosting and simple decorations like candy eyes or sprinkles.
Perfect for Easter brunch, spring parties, or anytime you want to add whimsy to dessert. The yield of 24 cookies makes them ideal for sharing. Customize with your favorite pastel shades using gel food coloring for professional-looking results. Store them in an airtight container and they'll stay fresh for days.
Last spring I found myself wrist deep in flour at midnight because my niece announced she needed bunny cookies for her class party the next morning. The kitchen was quiet except for the hum of the refrigerator and I was trying to remember why I thought this was a good idea. But when those first buttery rounds came out of the oven and I started piping tiny pink ears on them something shifted. Sometimes the best recipes happen under mild pressure and a lot of love.
I made three batches for Easter brunch last year and watched my normally skeptical brother reach for his fourth bunny. The frosting stays soft for days which means they actually taste better on day two. Theres something about a cookie with a face that makes everyone smile before they even take a bite.
Ingredients
- All purpose flour: This creates the perfect structure for cutout cookies that hold their shape
- Baking powder: Just enough lift to make them tender without spreading too thin
- Salt: Balances the sweetness and enhances the vanilla
- Unsalted butter: Room temperature butter creamed properly creates the best texture
- Granulated sugar: Creamed with butter until light and fluffy for that melt in your mouth quality
- Large egg: Binds everything together and adds richness
- Pure vanilla extract: Use the good stuff here since vanilla shines through
- Unsalted butter for frosting: The foundation of silky smooth buttercream
- Powdered sugar: Sifted to prevent lumps and create perfect spreading consistency
- Whole milk: Just enough to thin the frosting to pipeable perfection
- Pure vanilla extract: Deepens the buttercream flavor
- Food coloring: Gel colors work best for soft pastel shades without thinning the frosting
- Candy eyes: The finishing touch that brings these bunnies to life
Instructions
- Get your oven ready:
- Preheat to 350°F and line two baking sheets with parchment paper
- Whisk the dry ingredients:
- Combine flour baking powder and salt in a medium bowl and set aside
- Cream the butter and sugar:
- Beat softened butter and granulated sugar for 3 minutes until pale and fluffy
- Add the egg and vanilla:
- Mix until fully incorporated scraping down the sides of the bowl
- Bring the dough together:
- Gradually add dry ingredients mixing just until combined
- Chill the dough:
- Divide into two discs wrap and refrigerate for at least 30 minutes
- Roll and cut:
- Roll to 1/4 inch thickness and cut with bunny cookie cutters placing them 2 inches apart
- Bake to perfection:
- Bake for 8 to 10 minutes until edges barely start turning golden
- Make the buttercream:
- Beat butter until creamy then gradually add powdered sugar milk and vanilla until smooth
- Decorate your bunnies:
- Frost cooled cookies and add candy eyes or sprinkles letting everything set before serving
 Save
Save These became my go to contribution for every spring gathering after that first chaotic midnight baking session. I love seeing peoples faces light up when they spot the tray especially the grown ups who suddenly need two cookies because the bunny is looking at them.
Making The Frosting Silky Smooth
Room temperature ingredients are the secret to buttercream that pipes like a dream. If your frosting feels too stiff add milk one teaspoon at a time. Too thin beat in a bit more powdered sugar until you reach that perfect cloud like consistency.
Getting The Perfect Bunny Shape
Work quickly when rolling out chilled dough and use plenty of flour on your surface and rolling pin. If the dough starts getting warm or sticky pop it back in the refrigerator for 10 minutes. Cold dough keeps those cute bunny ear details crisp and recognizable.
Storage And Make Ahead Tips
The dough balls freeze beautifully for up to three months so you can bake fresh cookies whenever the mood strikes. Once frosted these cookies stay perfectly soft in an airtight container. Layer them between parchment paper to prevent the bunny faces from sticking together.
- Baked unfrosted cookies freeze well for a month
- Buttercream can be made ahead and refrigerated then brought to room temperature before using
- These actually taste better on day two when the flavors have melded together
 Save
Save Theres something so satisfying about turning simple ingredients into something that makes people genuinely happy. Hope these bunnies hop their way into your spring traditions too.
Recipe FAQs
- → How far ahead can I make the dough?
-
The cookie dough can be prepared up to 24 hours in advance and stored wrapped in the refrigerator. Overnight chilling actually improves the dough's texture and makes it easier to roll out without sticking.
- → What's the best way to achieve smooth buttercream?
-
Beat the softened butter thoroughly until creamy before adding powdered sugar gradually. Add milk one tablespoon at a time until you reach your desired consistency. For silkiest results, continue beating for 2-3 minutes after all ingredients are incorporated.
- → Can I freeze these decorated cookies?
-
Yes, freeze undecorated baked cookies in freezer bags for up to 3 months. Thaw at room temperature before frosting. If freezing decorated cookies, use a rigid container with parchment layers and consume within 1 month for best texture.
- → What if I don't have a bunny cookie cutter?
-
You can create a bunny shape freehand by cutting a simple oval body and round head, then attaching small pieces of dough for ears. Alternatively, use any seasonal cutter and decorate creatively with buttercream to suggest bunny features.
- → How do I prevent the frosting from melting?
-
Ensure cookies are completely cool before frosting. Room temperature buttercream holds its shape well for decorating. If your kitchen is warm, briefly chill frosted cookies to set the buttercream, then bring to room temperature before serving.
- → Can I make these dairy-free?
-
Substitute vegan butter sticks in both the cookie dough and frosting. Use plant-based milk alternatives like almond or oat milk. The texture may vary slightly, but the decorating results remain equally charming.
